Alado Installation
Average Assembly Time 90 - 120 minutes (2 Persons)
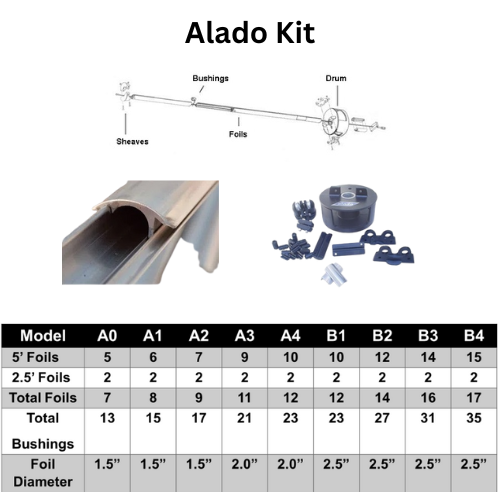
The Complete Alado Kit Includes:
- Top terminal with 2 Halyard Sheaves
- Foil Sections (5 Foot) and 2 (2.5 Foot)
- Polypropylene Bushings
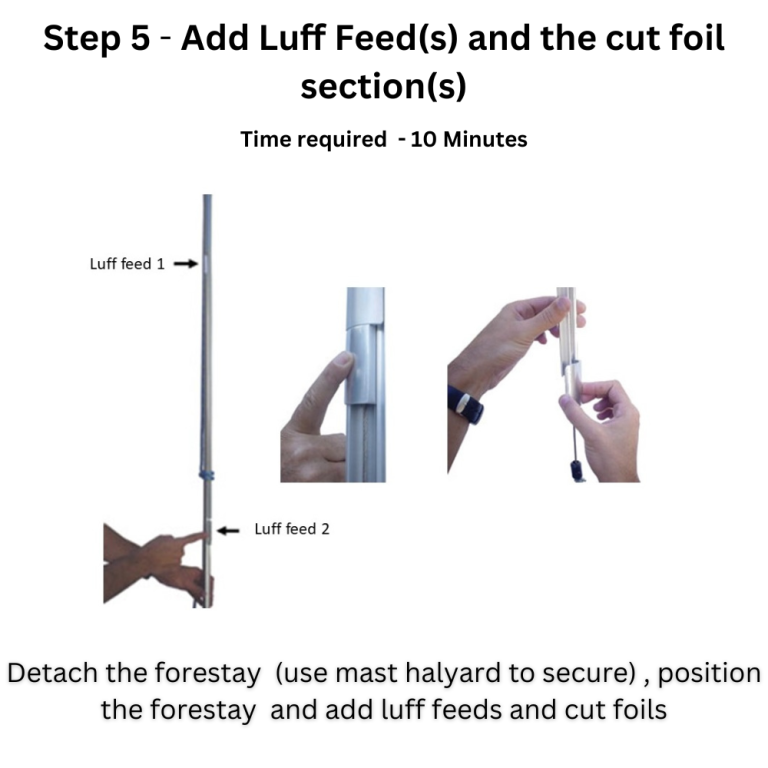
- 2 Luff Feed Adaptors
- Bottom terminal
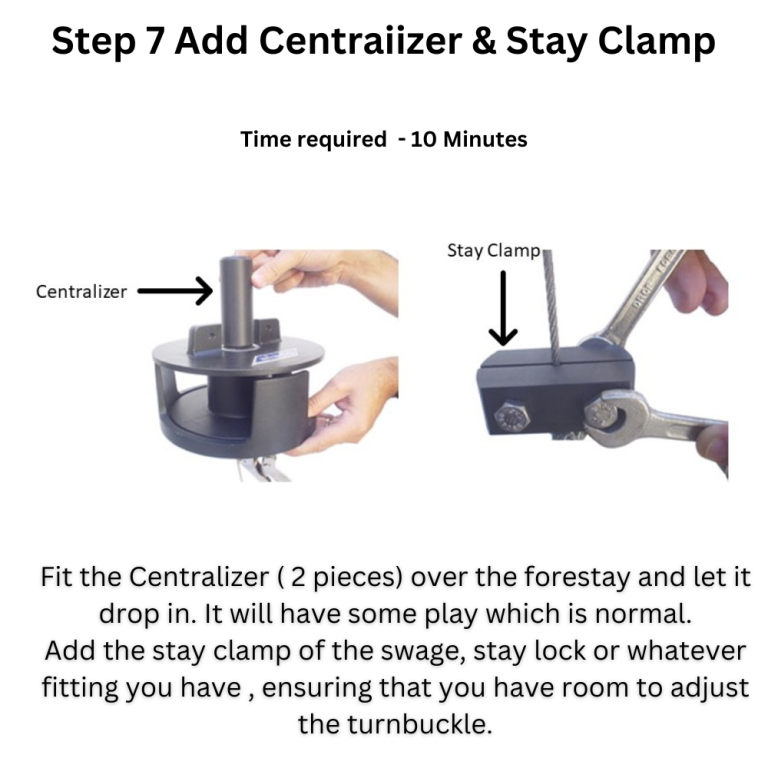
- Furling Drum & Centralizer
- Stay-Clamp
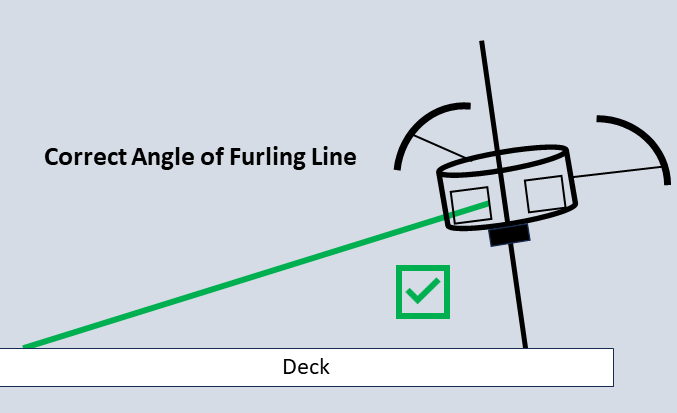
Secure Outer Drum
Secure the Outer Drum from spinning with the inner drum.
by attaching two lines from the Outer Drum Connection to the Bow Rail.
The Bow Pulpit is the most common way, or you can use a metal fabrication such as Bimini Fittings and stainless rail.
The Alado System
Designed for years of reliability under all types of weather and sailing conditions, our DIY installation process is simple and designed for on deck.
Download the ALADO INSTALLATION MANUAL here for a more a paper guide.
If you choose to have the system installed for you, Alado's easy and simple installation steps help you determine what the estimated labor hours should be and help prevent over billing of hours.
Preparation
As is the case with any project, 80% of the time is preparation. By having the materials ahead of time and prepared, your installation time normally under two hours.
For best results, install the system with mast upright and secured.
Step 1
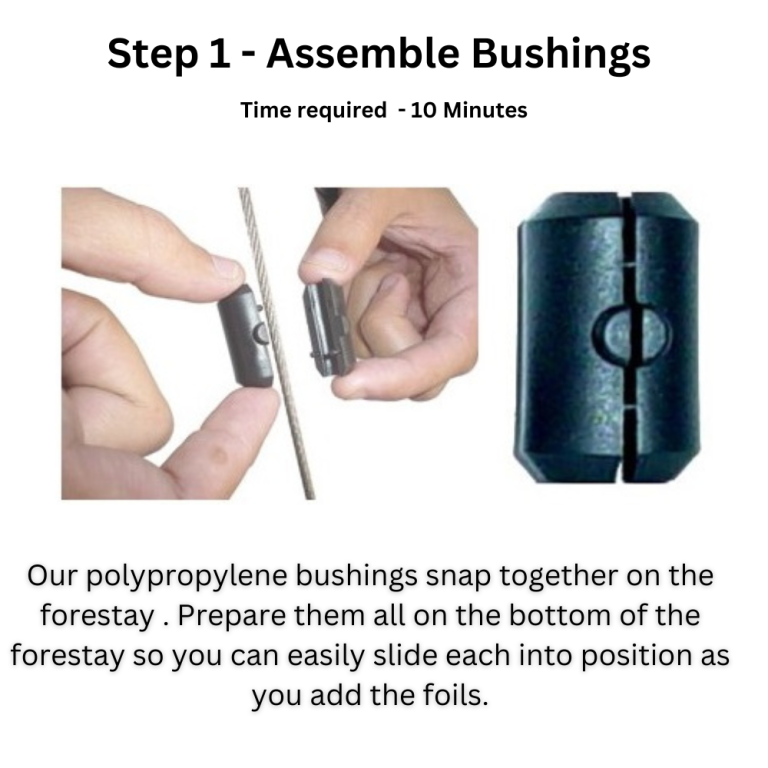
Adding the insulating bushings on the forestay.
Every Alado Roller Furling and Reefing System comes with 2-piece bushings that snap together and perform two important functions.
1. They keep the foil centered around the forestay wire.
2. Prevention of corrosion of metals between the foils and the forestay.
The bushing has a small node that fits in the hole on the foil. With one hand securing the bushing, align the grooves and slide upwards until the tops of the foils are aligned.
Bushing Tip: Use a glue stick to add some temporary adhesion to the bushing and snap the two pieces together one at a time per foil.
Step 2
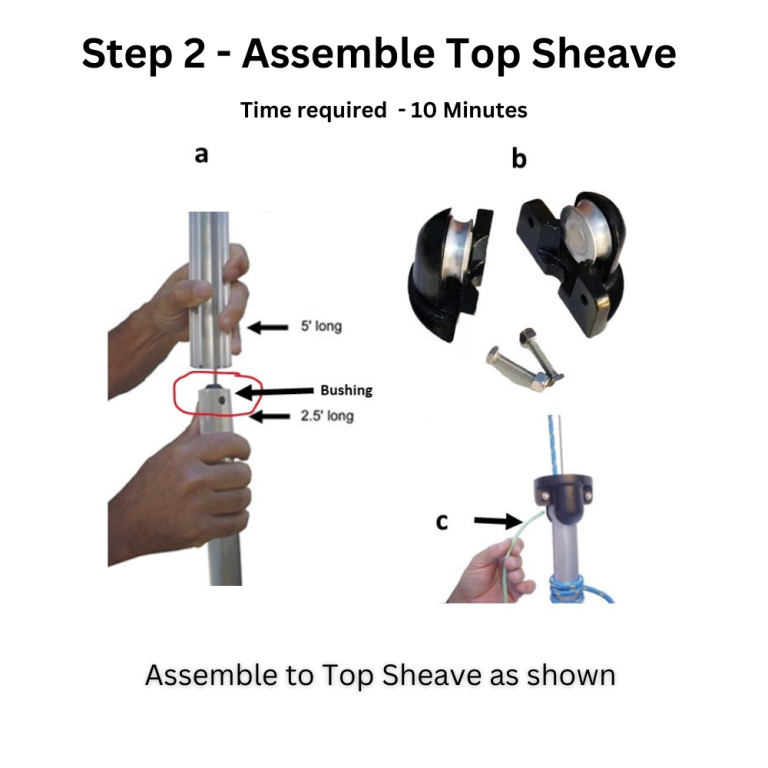
Assemble the Top Sheaves
Starting by interlocking a 5 foot and a 2 1/2 foot foil length until the top of the foils are flush(even) at the top.
Add the Top Sheave Assembly by tightening the two halves, but DO NOT OVERTIGHTEN these. The two halves can fit either side of the foils.
Add the bitter end(s) of the line you are using to make the Alado Halyard and make fast both bitter ends to a secure point on deck. leaving enough scope for the Top Sheaves to make their way to the mast top.
Remember that the entire system will rotate freely after installation and since it is supported by the deck, there is no swivel to bind halyards or break stays.
Step 3
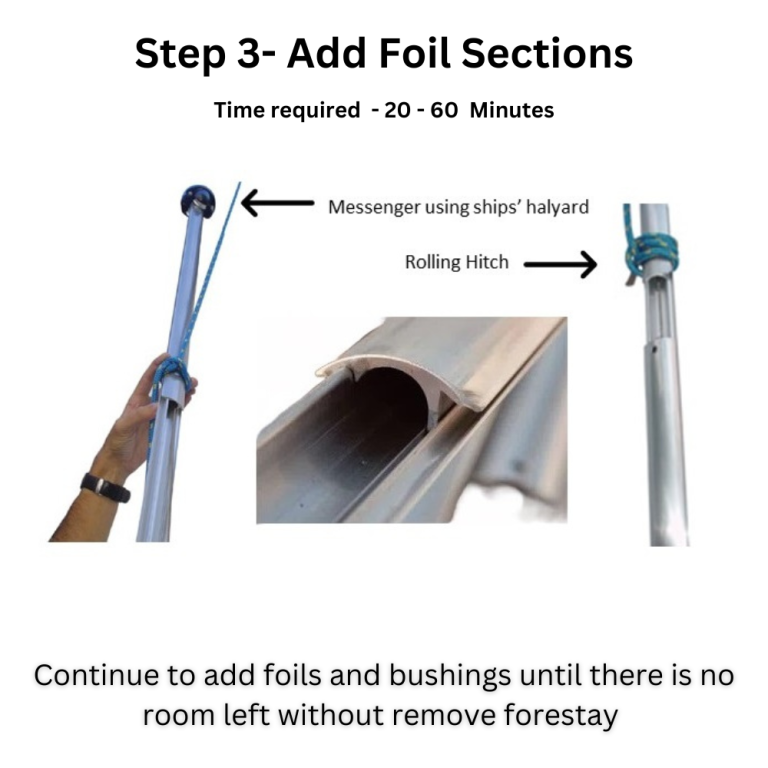
Add the remainder of the 5 foot foil sections
Add each 5 foot single section of foil to each 2 1/2 foot section (don't forget 1 bushing for each foil hole) and continue adding sections until there is no more room on the forestay to add a section.
Lifting the Sections
Using the jib halyard, attach a Rubber Clamp Mount or a rolling hitch knot on the foil, which you can slide down after every foil length is added.
If you need to take a break, just add a Vice-Grip below each foil to prevent the foils moving down. DO NOT pinch the foils.
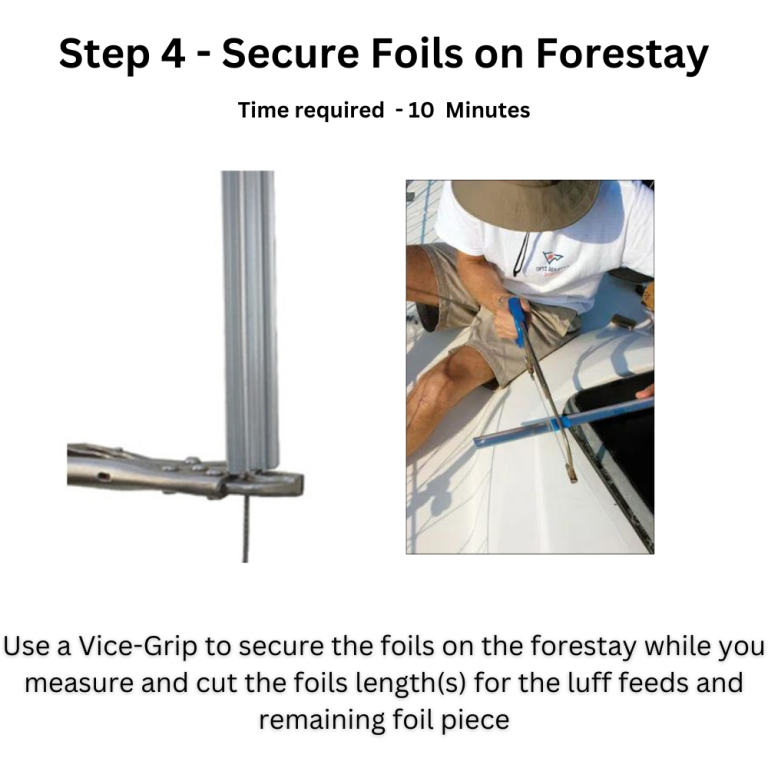
Steps 4 & 5
Secure the foils on the forestay.
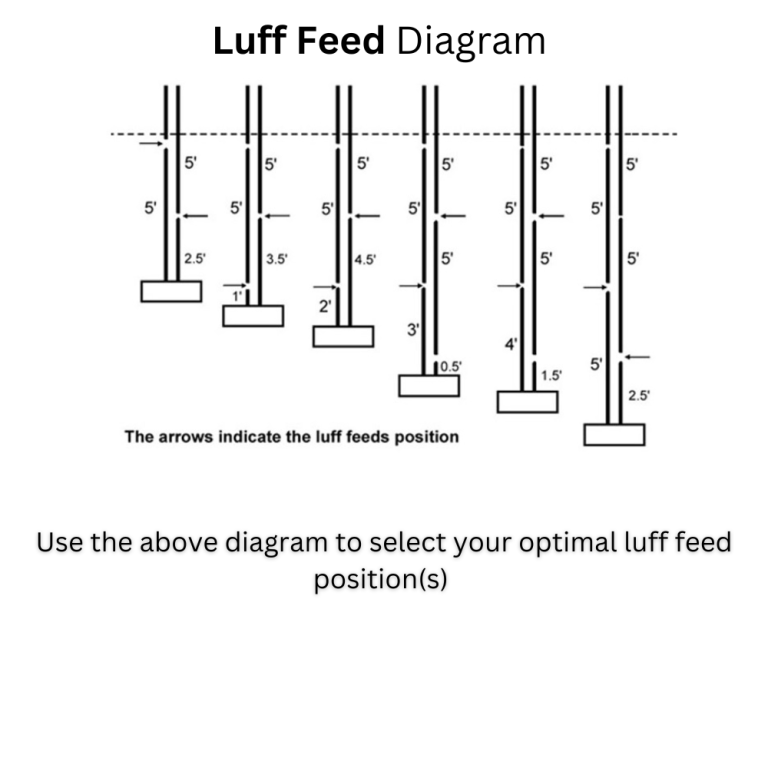
Once you have added as many sections of foil as you can on the forestay, it is time to secure the foils again and measure for the luff feed(s).
We suggest placing the luff feed about 10-12 inches above the drum to give you room to feed the sail. If using two luff feeds, leave 2 1/2 feet between the luff feeds for torsional strength.
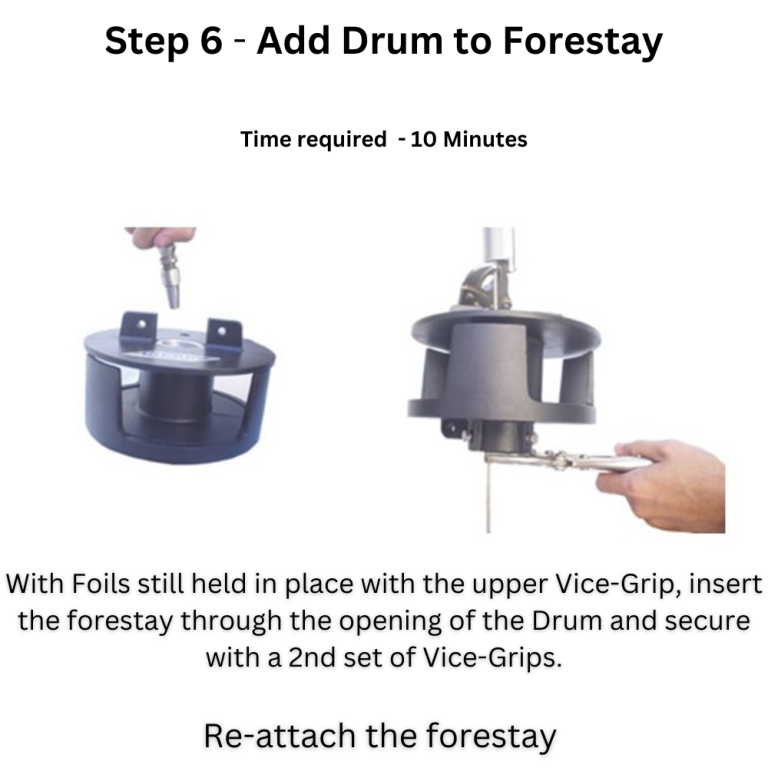
Steps 6
Detach Deck forestay, insert through Drum and reattach .
Step 7
Add Centralizer and Stay Clamp
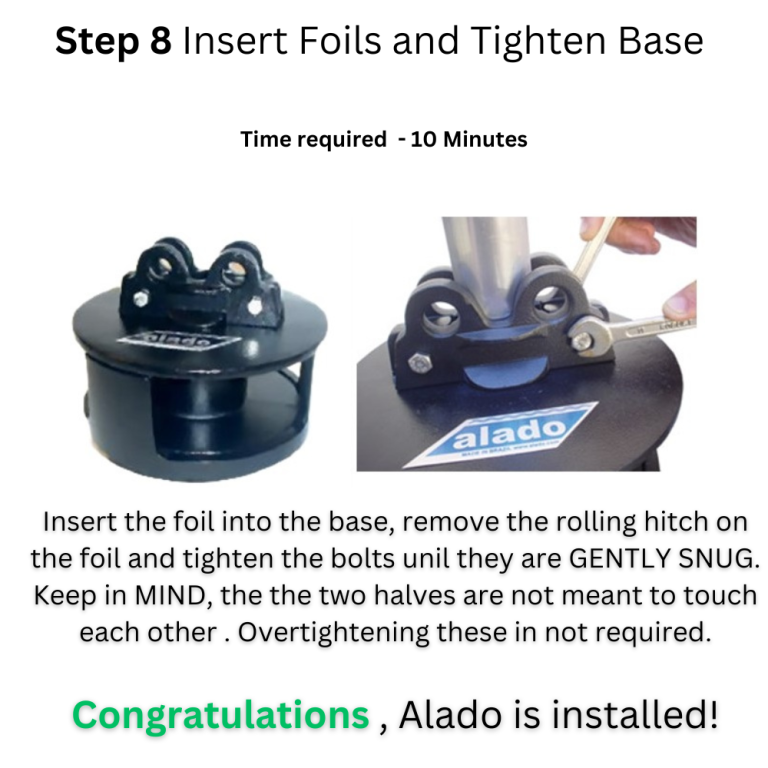
Step 8
Insert Foils and tighten base.
Average Alado Installation Time - Between 1 1/2 to 2 Hours
Securing the Halyard(s)
Endless Loop Method

By connecting both bitter ends at the sail head, you can easily lower and raise the sail. The double excess loop is tensioned and secured on at the drum eye and sits adjacent to the foils.
Secure the bitter end that will act as the downhaul to the bitter end of the uphaul knot. This prevents accidental loss of the halyard in the event the sail tears.
Cut-Off Method
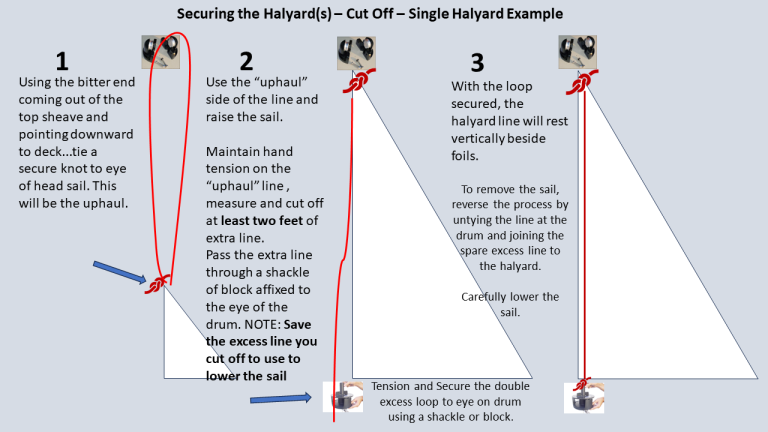
Connect 1 bitter end to the sail head eye. Raise the sail. Maintain hand tension on the “uphaul” line, measure and cut off at least two feet of extra line.
Pass the extra line through a shackle of block affixed to the eye of the drum. NOTE: Save the excess line you cut off to use to lower the sail
To remove the sail, reverse the process by untying the line at the drum and joining the spare excess line to the halyard.
Carefully lower the sail.
Accept the web tracker if Videos will not open.
Accept the web tracker if Videos will not open.